


This is my baby’s FIRST valentine’s day and with all firsts, it MUST be memorable! I had these items lying around my house and was able to put this together really quick for my baby girl and it cost me nothing!
What You’ll Need:
- A glue gun (clear tape works just fine if you don’t have one)
- White Embroidery Floss(any String will do)
- Card stock paper (you can use any colored paper, like construction paper for example)
- Scissors
- Printed image of a heart or you can just draw one!

First thing I did was cut out the printed heart image.

Next up, I folded the heart in half. This is to be used as a stencil.

Place that aside.Next thing I did was choose the assortment of colors I wanted for my paper hearts. Have fun with this and choose whatever you’re feeling!

Now, let’s start off with one piece of card stock paper.
Take it and fold it in half like I did below

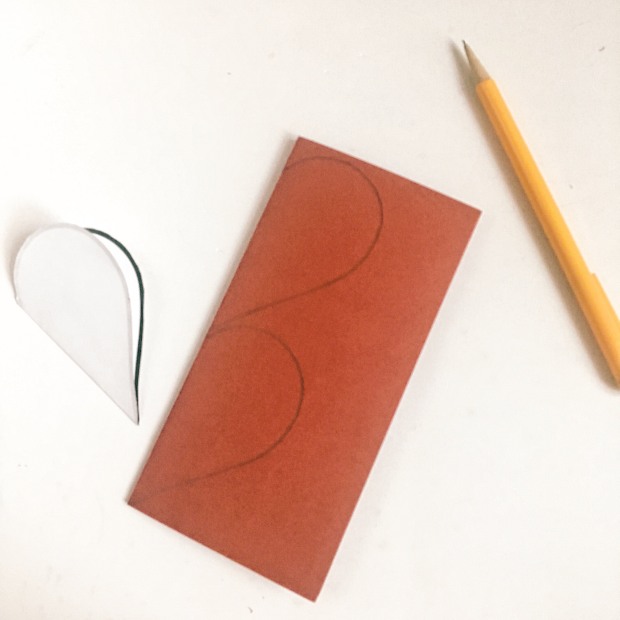
Using our “stencil” trace the half heart shape onto the paper.

The card stock paper allows for two half hearts along the folded side.
Do it twice to yield two hearts.

Next, cut the halves out.


Tada! Look how cute!

Now do that to rest of your hearts with the different color stock paper. Each paper gave me 2 hearts and I made approximately 46 hearts for this project!

Place those cuties aside. Next up, the string!

I chose white string to give it that “floating effect” against my white walls. I cut approximately eight pieces of string, each approximately 2 feet long. That was my preference ! But honestly, it all depends how long you want your backdrop to be.

Now we’re gluing! I used a glue gun to better secure them to store (for other projects). tape works fine. Place glue at the center of the heart and place string over it. Use tip of glue gun to secure string onto paper heart.

Like so! Make sure to leave about an inch and a half of string on the top of the heart. The extra string on the top will be used to hang the hearts.

Now, we glue the remainder hearts to each individual string! I did it this way so I can have a better idea on how to arrange the hearts. Once I glued the first hearts, I hung them up on the wall, so that I can glue the remaining hearts in an organized way.

I placed the hearts near the window to get the best light for the shoot! Natural sun light is the best when taking pictures.

Look at this cutie and look at those hearts!

This project was a bit tedious, but it turned out SOOOO cute towards the end! What I would’ve done differently with this is probably make the hearts smaller. Teeny hearts would’ve been so cute! Either way this was such a cute/simple way to do this! What do you guys think? Like, comment, and share!

Beautiful pictures and clear instructions. Love it!!
LikeLike